
Getting started
For general users, all that is needed is place the main bibulous.py file into the Python path and to tell LaTeX to use Bibulous rather than BibTeX as their bibliography engine. For users interested in using the auxiliary command bibulous_authorextract.py, this file must also be in the Python path, and must be in the same directory as the main file. It is also possible to tell any LaTeX front-end to use Bibulous in place of BibTeX. For Kile, Texmaker, TeXStudio, TeXworks, and Lyx (on Linux) and WinEdt (on Windows), instructions for doing this are given below.
Once you bibliography engine is set to Bibulous, remember that the filename within the \bibliography{...} command in your *.tex files must point to a Bibulous-format bibliography style template (.bst file) and not a BibTeX one. Note that if the bibulous.py file is placed in a standard Python path location, then its complete path does not need to be specified in each setup below. For example, if Bibulous is installed using pip install bibulous, then the Python path will be updated appropriately such that any call to bibulous.py will work.
For users who run the bibliography engine at the command line:
python /path_to_file/bibulous.py mybib.aux
where path_to_file gives the location of the bibulous.py file, and mybib.aux gives the name of the file to process. The output file will have the same filename as the aux file, but a different extension, i.e. mybib.bbl.
Kile: replacing BibTeX with Bibulous
- In Kile, go to the menu bar and select
Settings>Configure Kile. SelectTools>Buildand chooseBibTeXfrom theSelect a toolmenu (see the figure). To the right of the menu, after you selectBibTeXyou should see “Choose a configuration for the tool BibTeX”. Below the drop-down menu, select the button “New” and type in the nameBibulous(or whatever you prefer to call your new tool). Below, in theGeneraltab, type in the location of the bibulous.py file. And in theOptionsfield, type%dir_base/%S.aux.
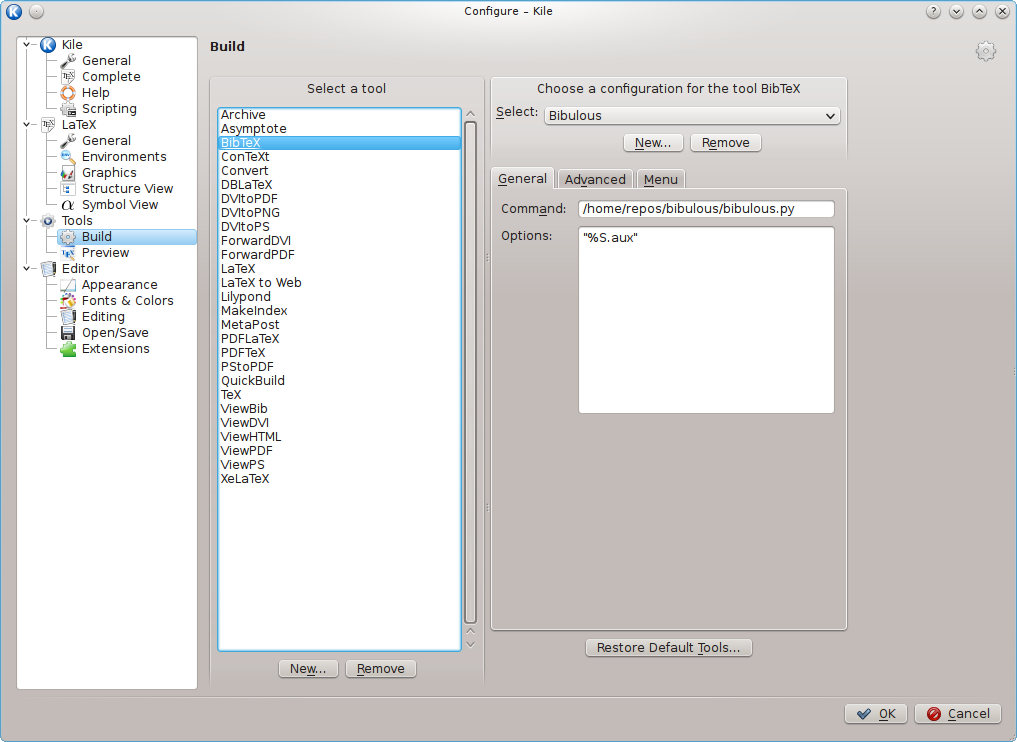
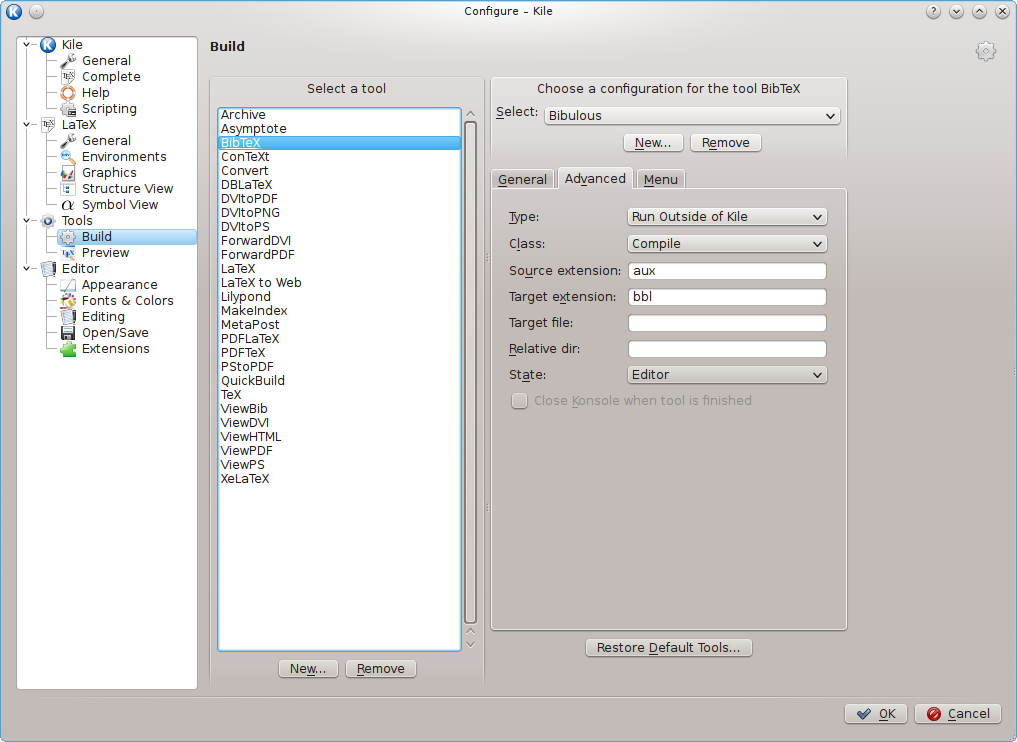
That should be it. In case your default setup is different, you can also check the Advanced tab settings and verify that they are as shown in the second figure. (That is, Source extension is set to aux, and Target extension is set to bbl.)
Note that the following variables are accessible in Kile’s
Optionsfield:%source = filename (i.e. filename with suffix but not path) %S = filename without suffix (and without path) %dir_base = source file directory (source file's path without the filename) %dir_target = target file directory (source file's path without the filename)
Modifying WinEdt5 to replace BibTeX with Bibulous
- Go to the menu
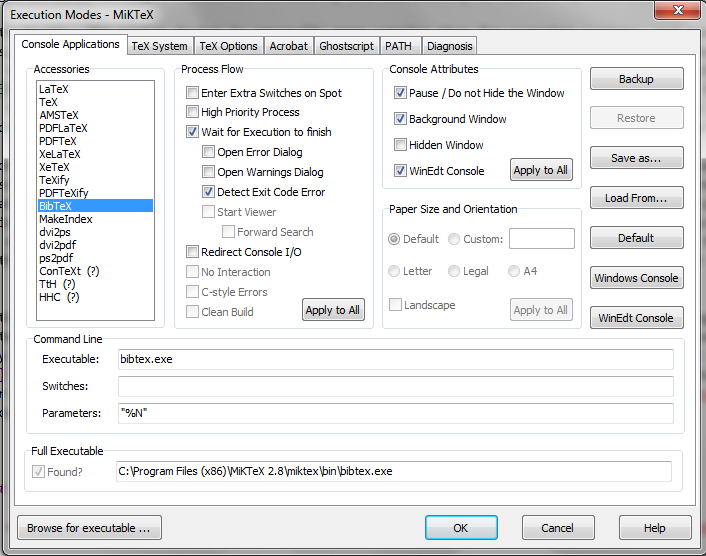
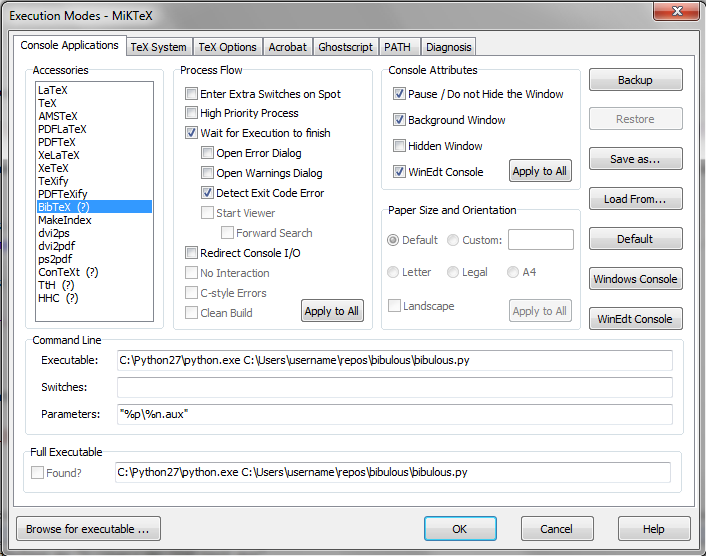
Options>Execution Modes. In theConsole Applicationsmenu on the left hand side, selectBibTeX. Then replace the threeCommand Linefields with the ones shown in the figure, replacing the example file paths with the ones correct for your installation of Python and bibulous.py.
Note that the following are definitions of WinEdt registers:
%f = full path of active file (= %p/%n.%t)
%n = name of the active file
%p = the path of the active file
%t = the extension of the active file
%q = the path relative to the main file (i.e. for subdirectories)
%b = WinEdt's local working directory (not the tex file directory)
%B = path to the WinEdt executable file
Modifying Texmaker to replace BibTeX with Bibulous
On the main menu bar, select Options then Configure Texmaker. In the Bib(la)tex field, replace bibtex %.aux with the location of your bibulous.py file, followed by %.aux. The following figures show the configuration window before and after the change:
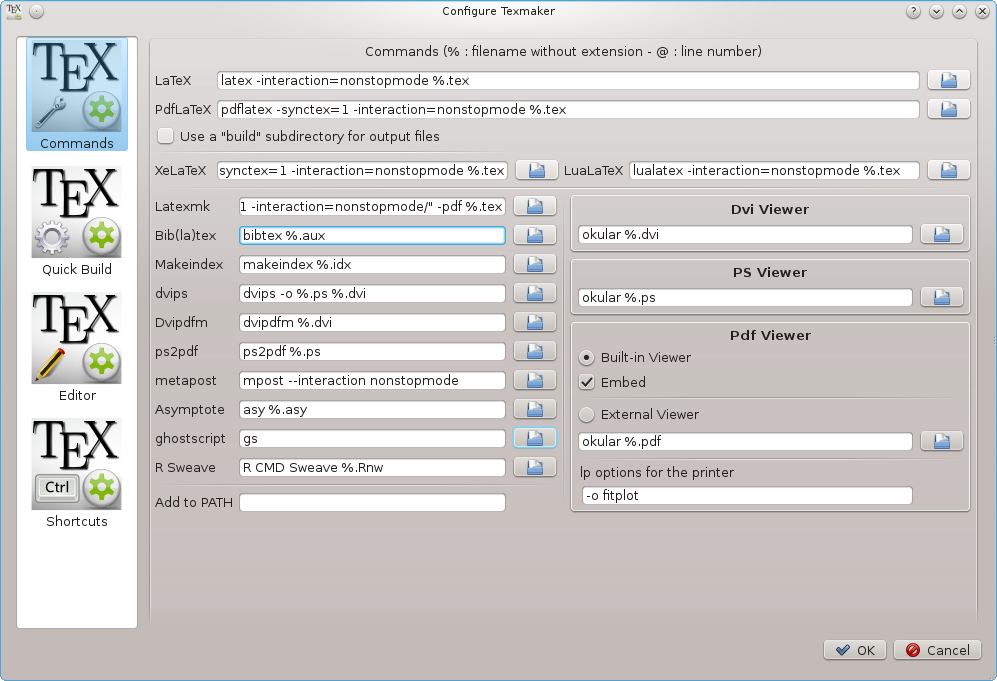
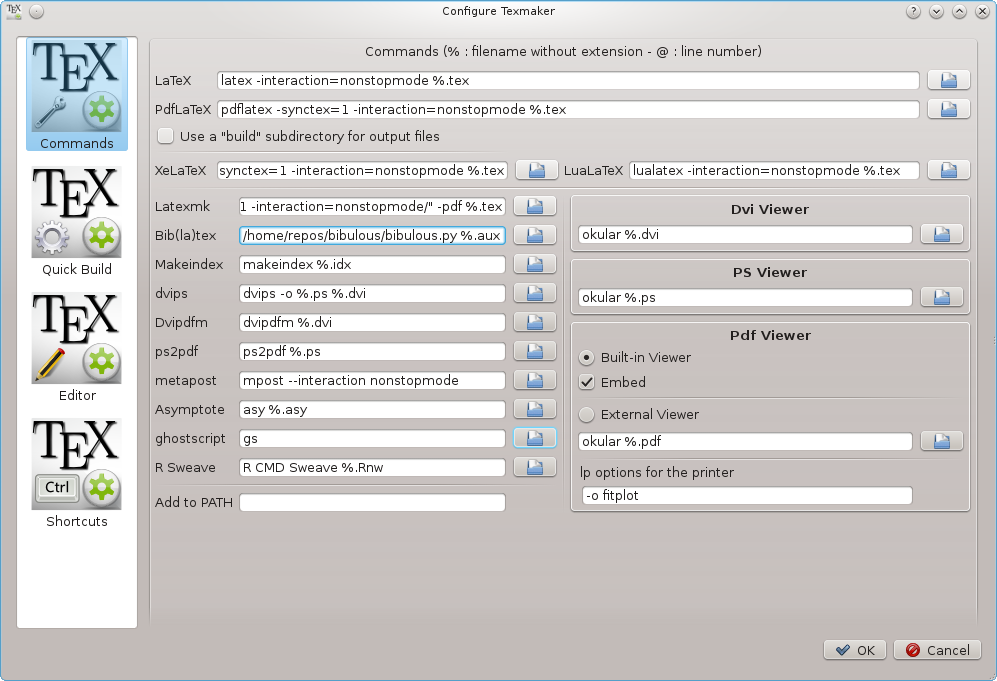
(The example shows the location of the bibulous.py file as /home/repos/bibulous/bibulous.py, but you need to replace it with the appropriate location on your own system.) Also note that the bibulous.py must be executable by the user.
Modifying TeXStudio to replace BibTeX with Bibulous
On the main menu bar, select Options then Configure TeXStudio, and then the Commands tab. In the BibTeX field, replace bibtex %.aux with the location of your bibulous.py file, followed by %.aux. The following figures show the configuration window before and after the change:
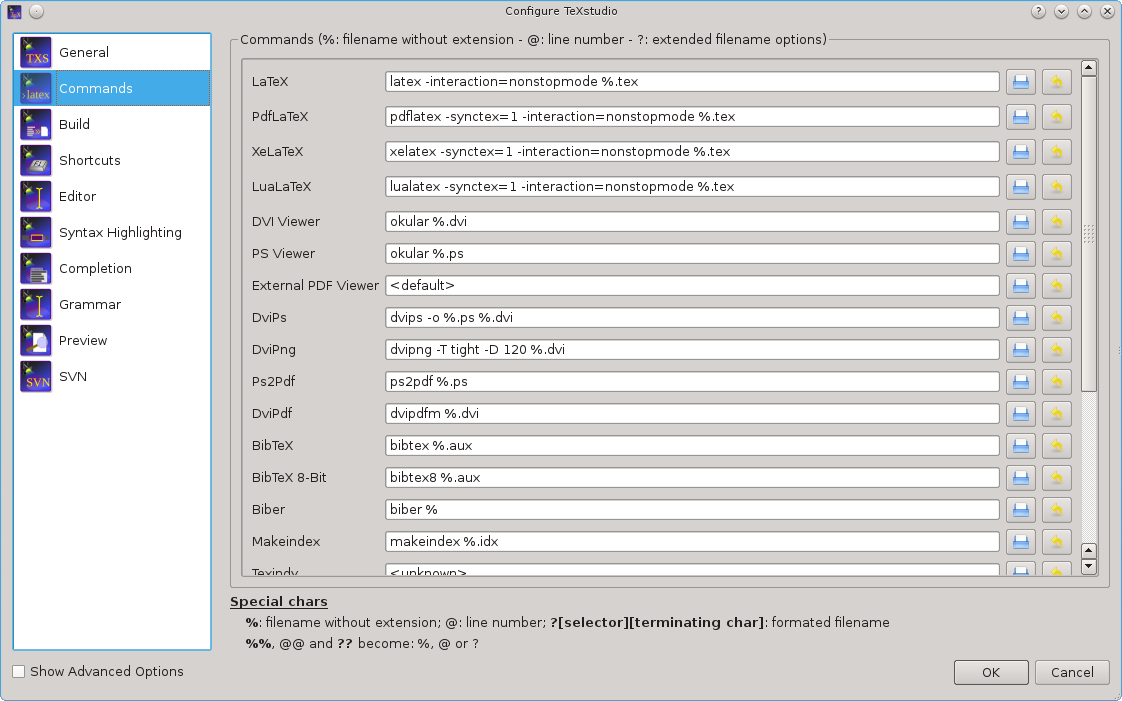
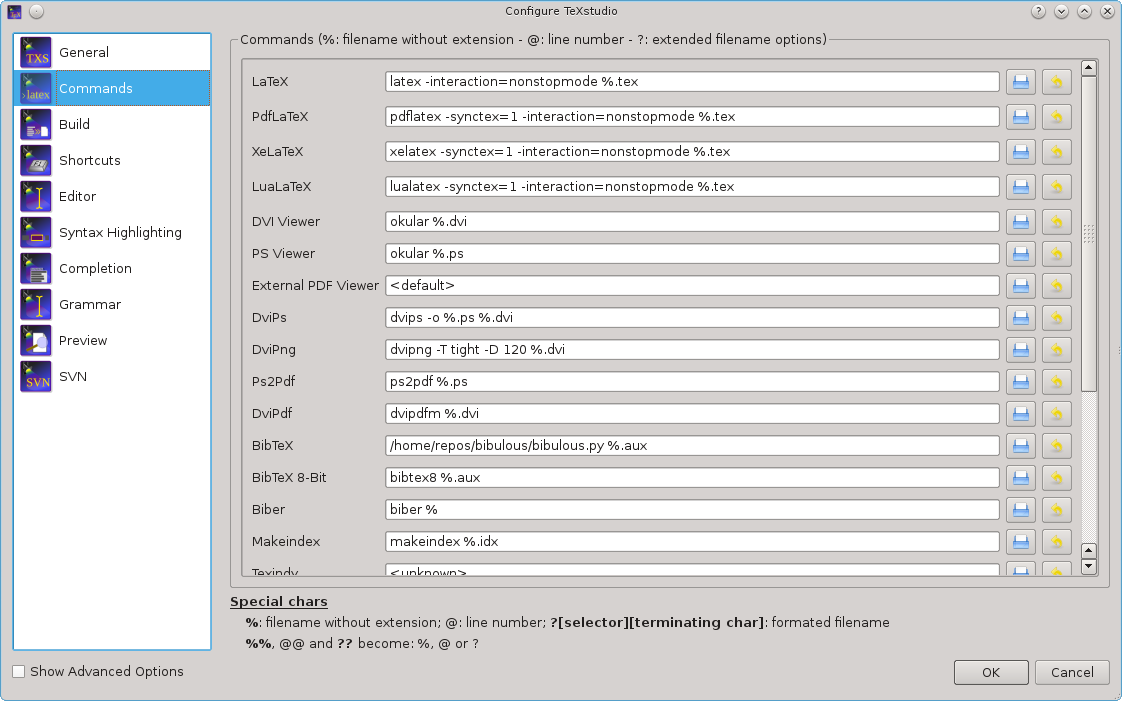
(The example shows the location of the bibulous.py file as /home/repos/bibulous/bibulous.py, but you need to replace it with the appropriate location on your own system.)
Modifying TeXworks to replace BibTeX with Bibulous
On the main menu bar, select Edit then Preferences..., and then the Typesetting tab. In the Paths for TeX and related programs list, insert a new entry to give the path to your bibulous.py program. (This is the highlighted entry in the figure shown below.) In the Processing tools list, double-click on BibTeX. This brings up a new dialog window. In that window, remove bibtex from the Program field and replace it with bibulous.py. The following figures show the configuration windows before and after the change:
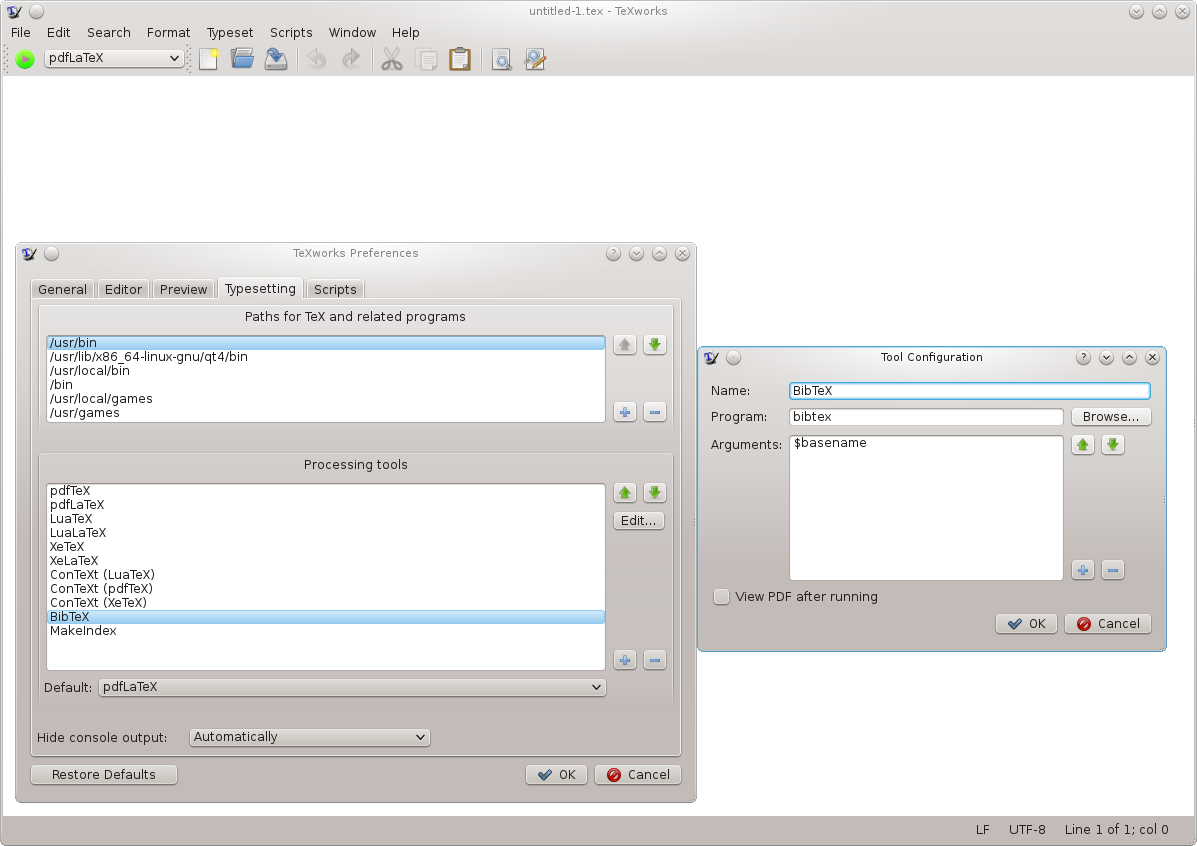
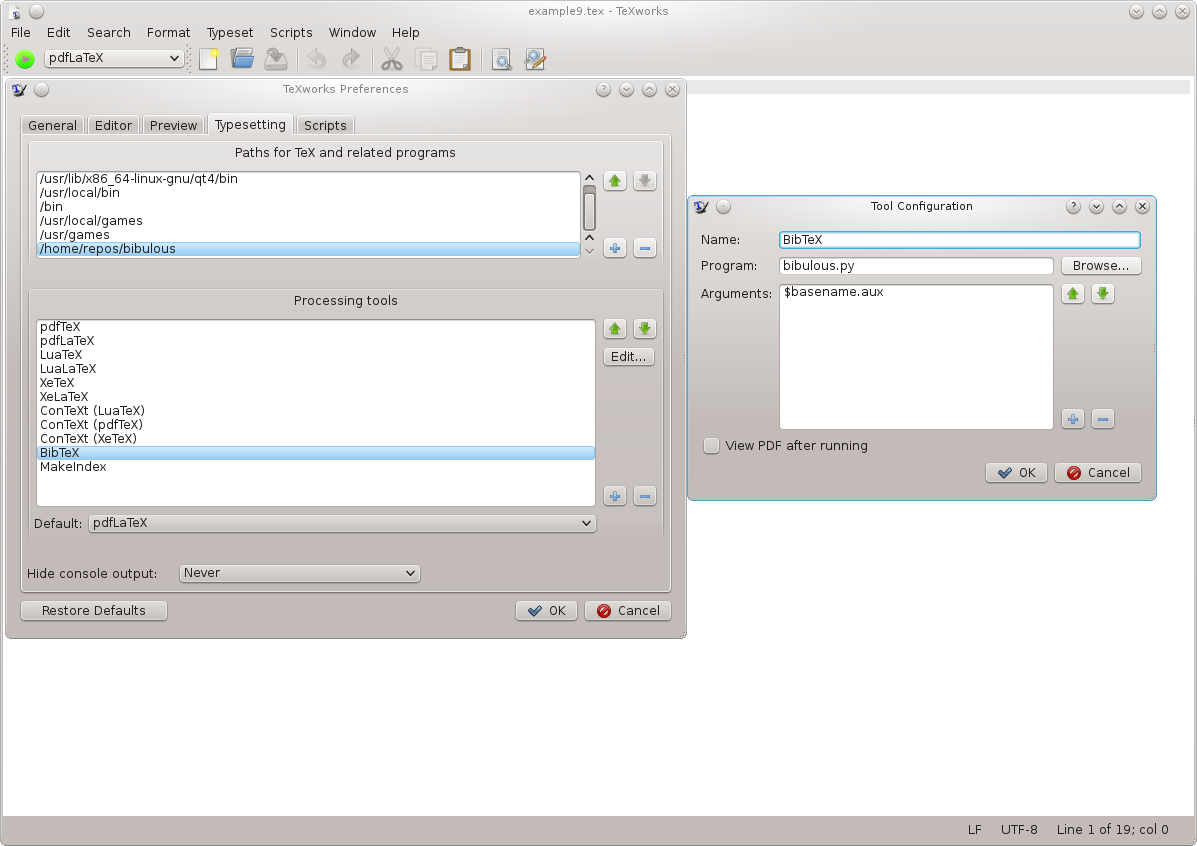
(The example shows the location of the bibulous.py file as /home/repos/bibulous/bibulous.py, but you need to replace it with the appropriate location on your own system.)
Modifying LyX to replace BibTeX with Bibulous
On the main menu bar, select Tools then Preferences, and then expand the Output dropdown list and click on the LaTeX field. In the Bibliography generation section of the resulting dialog, change Processor to Custom and in the Command field insert the full path to your bibulous.py program. The following figures show the configuration windows before and after the change:

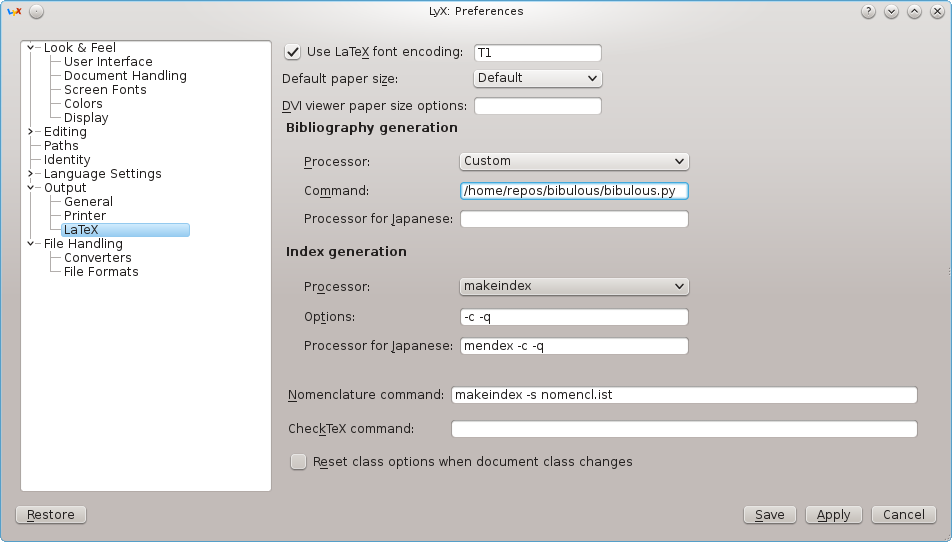
(The example shows the location of the bibulous.py file as /home/repos/bibulous/bibulous.py, but you need to replace it with the appropriate location on your own system.)